waziper Installation Guide for Aapanel (Apache2)
waziper Installation Guide for Aapanel (Apache2)

waziper Installation Guide for Aapanel (Apache2)
Summary: If you're using Aapanel with Apache2, here's a step-by-step installation guide.
Part 1: Install and configure AApanel Server
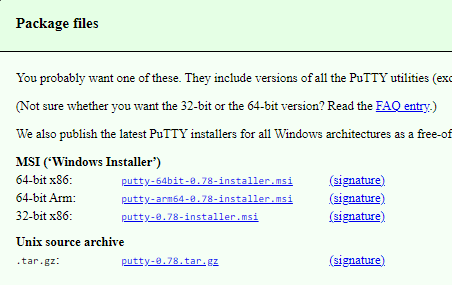
Download PuTTY
Download the latest version of PuTTY SSH from the official website. After that, install it on your computer. It’s as simple as that.
Connect PuTTY & Install aaPanel
Cloud Server Account Ex:
IP: 178.128.84.87 username: root password: XvrJ@pDYux2R5Qd
Install Aapanel
wget -O install.sh http://www.aapanel.com/script/install-ubuntu_6.0_en.sh && bash install.sh forum
Please keep a record of your AApanel login details once the installation is finished. EX:
http://178.128.84.87:7800/5f587cdf
username: jsilnw8t
password: 48ea536b
Install libraries
sudo apt-get install libnss3-dev libatk-bridge2.0-dev libcups2-dev libxkbcommon-dev libgtk-3-dev
Set up AApanel Server using Apache2 web server
Please login aapanel and set up according to the instructions
aaPanel Internal Address: http://xxx.xxx.xxx.xxx:7800/f7eec324
username: xxxxxxxxx
password: xxxxxxxxx
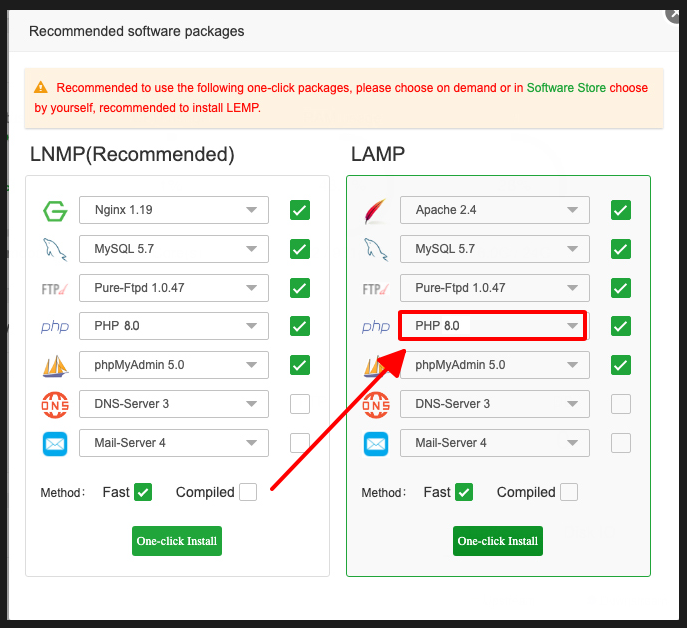
PHP Setup:
- Configuring PHP with version 8.0 or 8.1.
- Allow_url_fopen: allow_url_fopen=On
- Memory_limit = 512M or higher ( Importance)
- Upload_max_size = 512M
- Post_max_size = 512M
- Upload_max_filesize = 512M
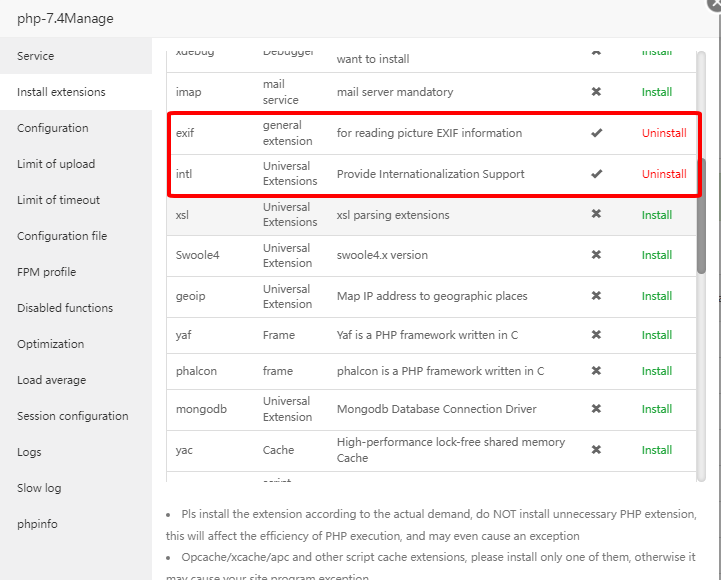
Install Extensions:
Installing PHP extensions: exif and intl
Enable Functions:
Allowing execution of functions including exec, putenv, and shell_exec.
Please watch the video tutorial
Part 2: waziper Install Main Script
Install Waziper Main Script
Please prepare the information before proceeding with the installation
Purchase code:
Database
username:
databasename:
password:
Admin Account login
username:
email:
password:
Timezone
Please watch the video tutorial
Part 3: Install server domain
Download whatsapp_server_module_main.zip file and upload tu server
Step 1: Create Api domain and connect them to your Server IP Address
Ex: api.yourdomain.com
Please set up SSL for Api domain Please watch the video tutorial
Step 2: API Domain Configure
Insert code below into your API Domain: Please check that you have inserted the code at 2 places as instructed
       ProxyPass http://127.0.0.1:8000/
       ProxyPassReverse http://127.0.0.1:8000/
Please watch the video tutorial
Step 3. Create a directory in the root folder to upload “whatsapp_server_module_main.zip”.
(whatsapp_server_module_main.zip = waziper_server.zip in video)
To ensure the safety and security of the system, please place the file in the root directory.
Step 4. Config Database for API Domain
Set up a common database with Main Script
Part 4: Setup Nodejs
The current version is fully compatible with nodejs 16 and working smoothly.
Install Nodejs version manager 1.6
Install Cronj
Please create Cron according to the instructions
Cron: Once/minute:
sh -c 'cd /root/wa_server && node app'
/root/wa_server: is the path to the server.zip installation directory
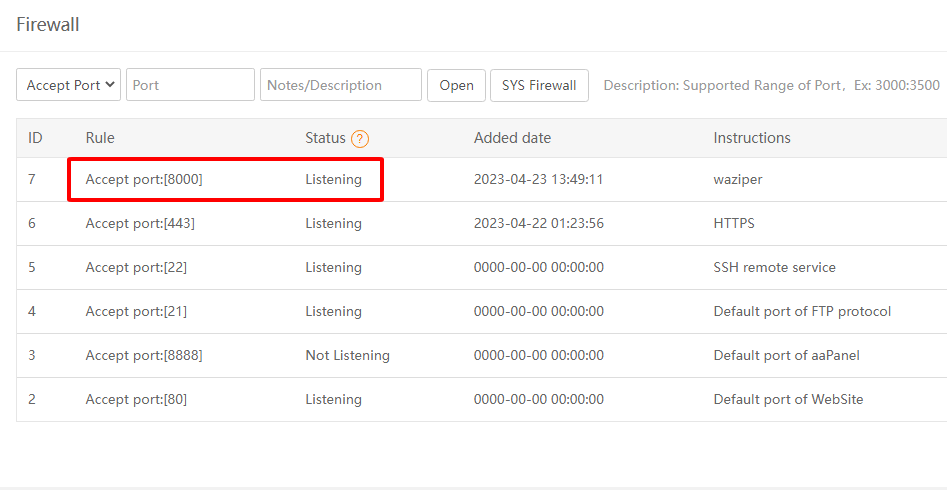
Open PORT 8000
Please open port 8000 according to instructions
To switch the port to Listening state, you need to complete the following steps:
- Install server domain
- Install Nodejs version manager 1.6
- Install Cronj
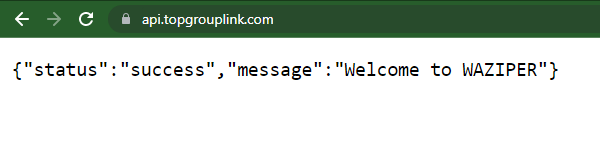
Check the working status of the api domain
Please check the link
https://api.yourdomain.com/
{"status":"success","message":"Welcome to WAZIPER"}
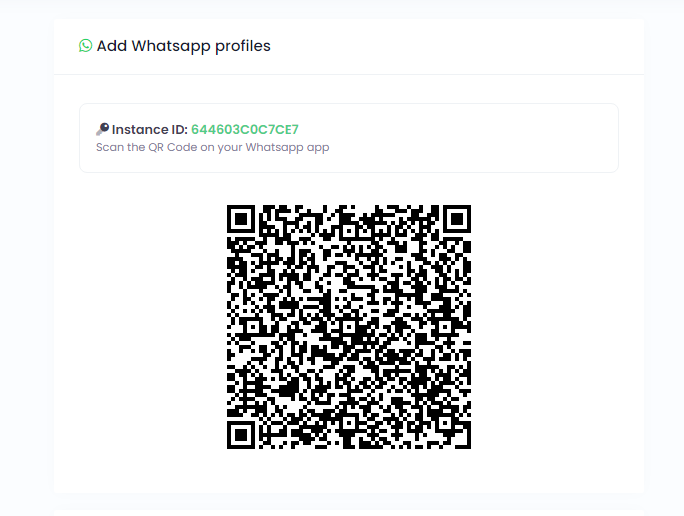
Please check the link
https://api.yourdomain.com/get_qrcode
{"status":"error","message":"The Instance ID must be provided for the process to be completed"}

Part 5: WhatsApp API Configure & Check Qrcode
Api domain set up correctly
Correct setting
https://api.yourdomain.com/
Wrong setting
https://api.yourdomain.com
http://api.yourdomain.com/
api.yourdomain.com
and more….
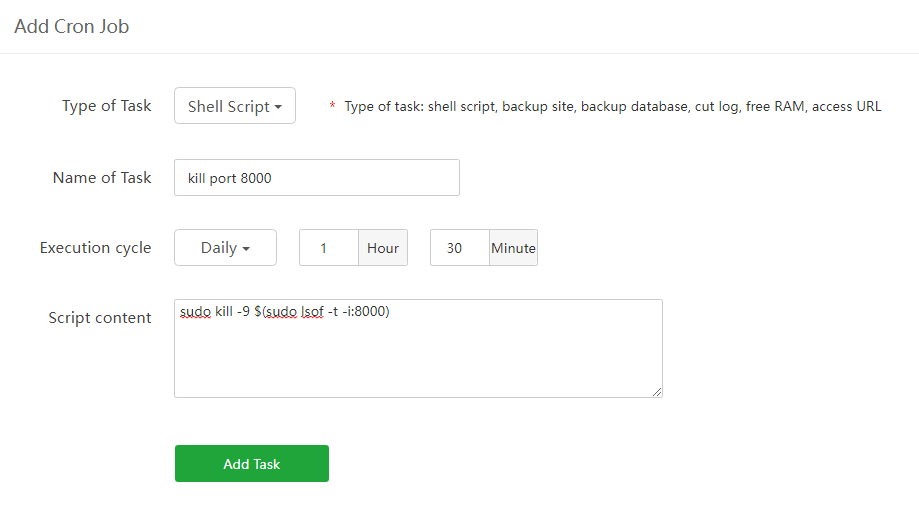
Set up Cronj according to the daily cycle
sudo kill -9 $(sudo lsof -t -i:8000)